How do I create a new Order?
This guide describes how to create a new Order in Fixably. Depending on your configuration and repair type, the steps may vary slightly, but these steps are expected for most Orders.

Written by Annukka Matilainen
Updated at May 19th, 2026
- Release Notes
- Newly Released Features
- Getting Started
- Roles & Permissions
- Manifests
- Order Management
- Automations
- Employee Management
- Customer Management
- Customer Portal
- Stock Management
- Part Requests
- Price Lists
- Invoicing
- Reporting
- Custom Fields
- Integrations
- GSX
- Shipments
- Service Contracts
- Configuring Your Environment
- Incoming Part Allocation
- Appointment Booking
Table of Contents
Overview
- Attach a Device.
- Select or Create a Customer.
- Add Issue Description and Notes.
- Select Service Location and Status.
- Add Products.
- Take Assignment.
- Add Spare Parts.
-
Apple only: Create GSX Repair.
- Close the GSX Repair.
- Charge or Invoice.
- Order Ready.
Step-by-Step Instructions
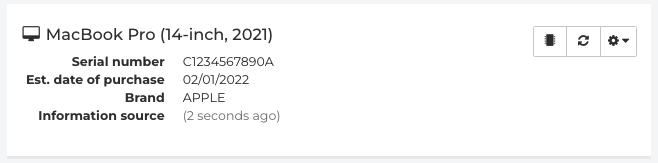
Attach a Device
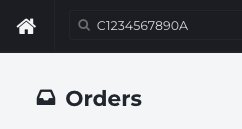
- In the Universal Search Field at the top of the page, please search for a device by Serial Number.
- A pop-up will appear with various information, depending on the type of device. If you are using an OEM Integration, additional details like the warranty status and purchase date may be available.
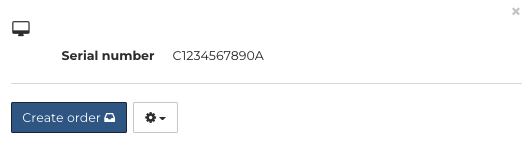
- Select Create order to open a new order.
Select or Create a Customer
Fixably has different options for saving customer information. You can start by clicking the user icon below Cash customer.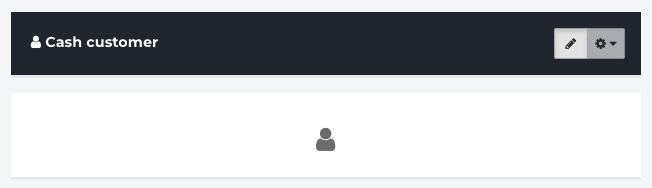
- Search for an existing customer using their name, phone number, email, or company name from the customer pane.
- Select Create customer to add a new customer profile. Fill in the necessary information and click Save.
- Bring the customer profile to the order by clicking the
 icon.
icon.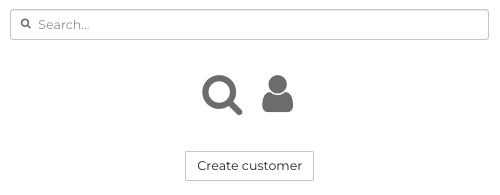
For walk-in customers, you can also use the End user fields. This is handy for small purchases where you may not require all customer details or don't need to save the information for later use. You can also list an end user for companies or organizations.

Add the Issue Description and Notes
To enter notes in Fixably, add any required information in the Add Note field. Select your note type from the drop-down menu and choose whether the Note should be Public or Internal.

Public Notes are visible on printouts and the customer portal.
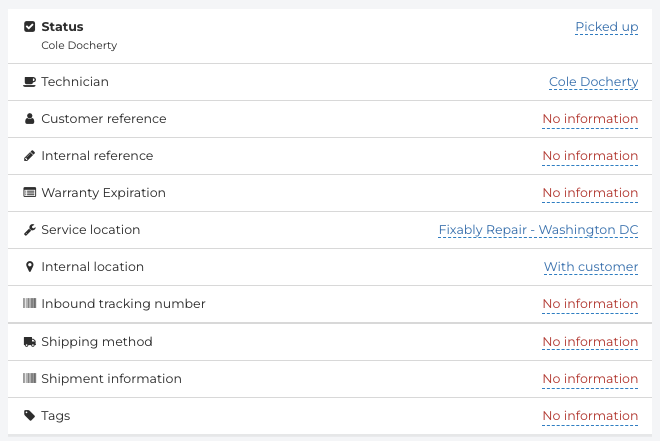
Select Service Location and Status
- Select a Service Location. If you have a default service location, this is already set automatically (See User Settings --> General).
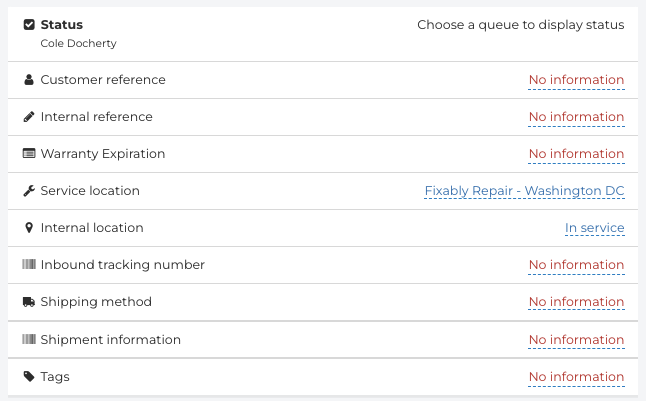
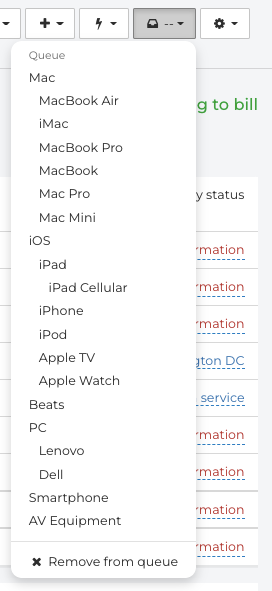
- Fixably sets the Service Queue automatically for most devices, but you can select it manually from the toolbar at the top of the page.
- From the right-side panel, adjust the Order Status if it wasn't set automatically.

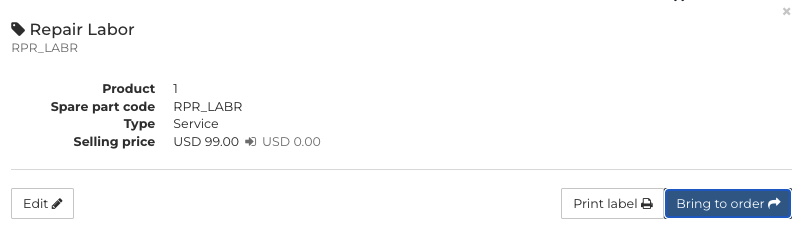
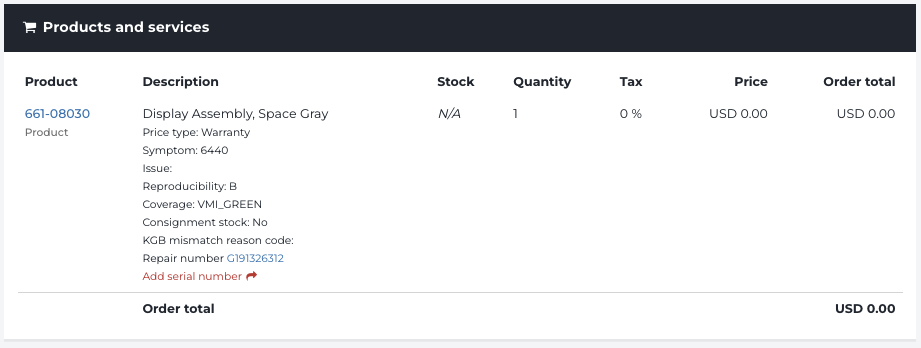
Add Products
- To add a Product to your order, click the + button. Search for an existing product or create a new one by selecting Add product.
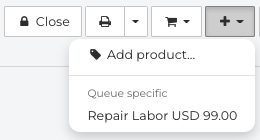
- After selecting a product, click the Bring to order button. Products have warranty, selling and exchange prices that you can choose separately. If you are using an OEM Integration, additional options may also appear. After selecting the appropriate options, click Bring to order again.
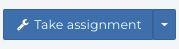
Take Assignment
Use the Take assignment button to assign the order to you quickly.
Add Spare Parts
Click on the Microchip to bring up the spare parts list in the device details section. If you use an OEM Integration, parts are automatically filtered by the device's serial number. Spare parts are added like other products, but additional details (for example, the symptom and reproducibility of the issue) may be required.
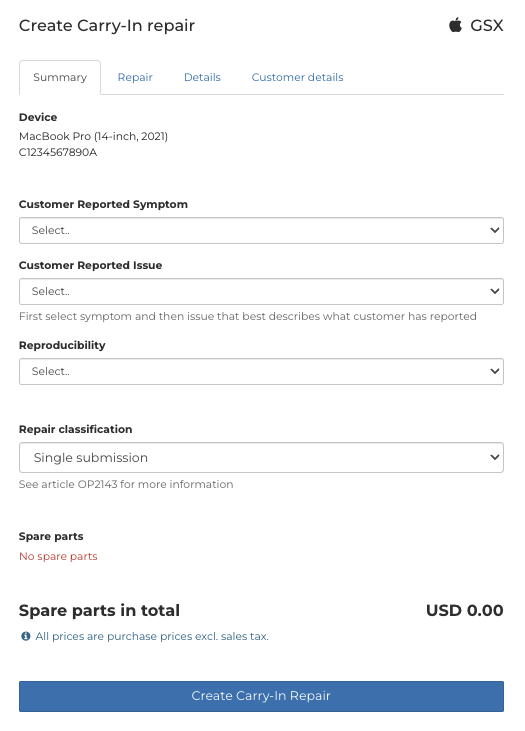
Create a GSX Repair (Apple only)
- Create GSX repairs from the Fixably application by clicking on the Gear Icon in the device information section. Select the appropriate repair type (for example, Carry-in or Whole Unit Mail-in) to create the repair. Previously made GSX repairs can be linked to a Fixably order by selecting Attach to order.

- After selecting a repair type, the repair creation pane will appear, containing four tabs:
- Summary - Device details and reported symptoms.
- Repair - Part and coverage details.
- Details - Upload additional files, request Apple review, adjust Unit Received Date / Time.
-
Customer Details - Customer name, phone number, address, email and other information sent to Apple.
- Please check and validate that the information being sent to Apple is correct, and then click Create Carry-in Repair.
Close a GSX Repair (Apple only)
You can add part serials by clicking Add serial number under the product description.
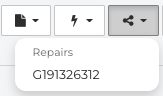
- You can view all repair details by opening the repair from the top toolbar menu or clicking its GSX Dispatch ID. If there is any mismatch, this step also syncs the repair status from GSX to Fixably.
Click the Close button to mark the GSX repair as Ready for Pickup in GSX and Fixably.

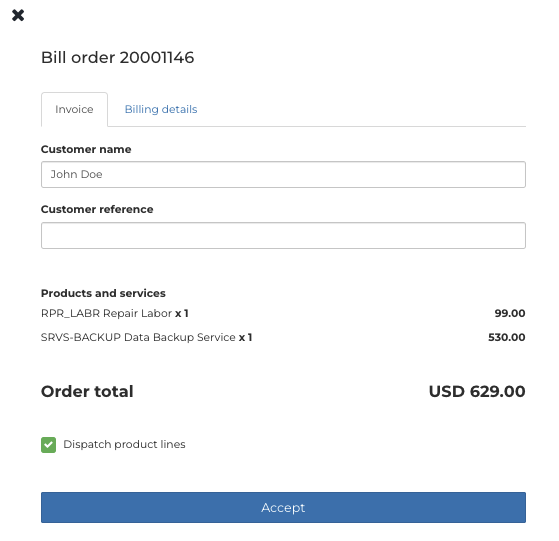
Charging and Invoicing
- From the Shopping Cart, select Charge or Invoice.
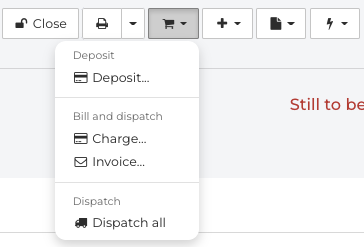
Charging is appropriate when the order is being billed and paid immediately. For example, use Charge if the customer pays for a completed order with a credit card.
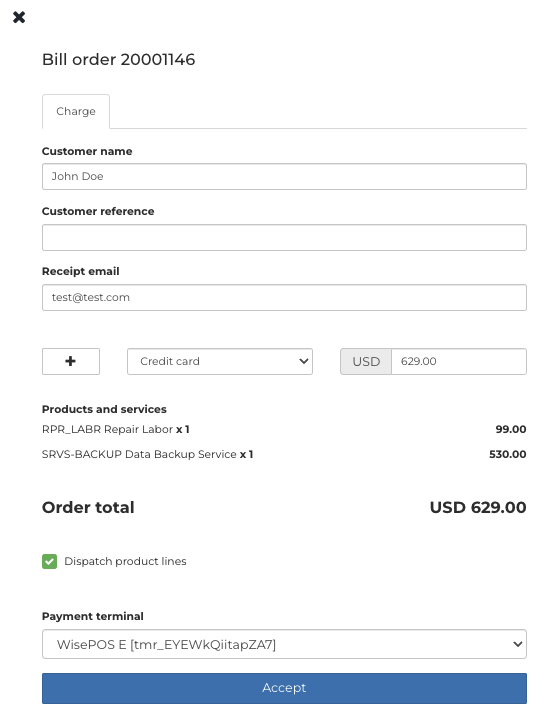
- From the billing form, select the customer's payment type. Administrators can customize available payment methods in System Settings / Payment Methods. Select the Dispatch product lines checkbox to mark all products dispatch and remove them from stock. To confirm the payment, click Accept.
Receipts are available from the Print Icon or the Navigation Menu under Invoicing / Receipts.

An Invoice marks the order as billed and creates an invoice that you can send to the customer for later payment.
- Select how the customer will receive the invoice (mail, online or email) from the Billing details tab and click Accept to confirm. Invoices are available from the Print Icon or the Navigation Menu under Invoicing / Single Invoices. Single Invoices can be marked as paid or exported to a 3rd party invoicing system.
Order Ready
After the customer has received the device, click Order Ready.

The order will now be marked as With customer, and status is set to Picked up.